NPR Tutorial: Making of the Mixed Use Modern : Part 2
Post-Processing in Photoshop
Now the fun part begins. You will need to stack all the various images you created previously. You should have the following
- Raw unprocessed image from your render engine.
- FotoSketcher Image (Optional, See Part 4 of tutorial)
- Exported linework from SketchUp (Standard Resolution)
- Exported linework from SketchUp (Double resolution).
- Window mask exported from SketchUp. (Usually turned off)
- Alpha channel exported from render engine or SketchUp. (Usually turned off)
As noted previously, you will need to reduce by 50% the double resolution linework export before stacking your images in Photoshop. Open Photoshop and place all the images in one file. An easy way to do this is “File > Scripts > Load Files into Stack…” or you can simply copy and paste each image individually into the master image file. Your Photoshop file should look like the image below (ignore the ‘Backup’ folder) . The raw Photorealistic render is placed at the bottom with the various other layers placed on top and turned off.

Photoshop Layering
I then copy the Raw Render layer and make adjustments. Depending on your skill level you may want to make many adjustments to different settings (e.g. Contrast/brightness, curves, levels, etc.). You may do things very differently than listed here. There are many ways to improve the image and these are just a few that I know and find easier to implement.
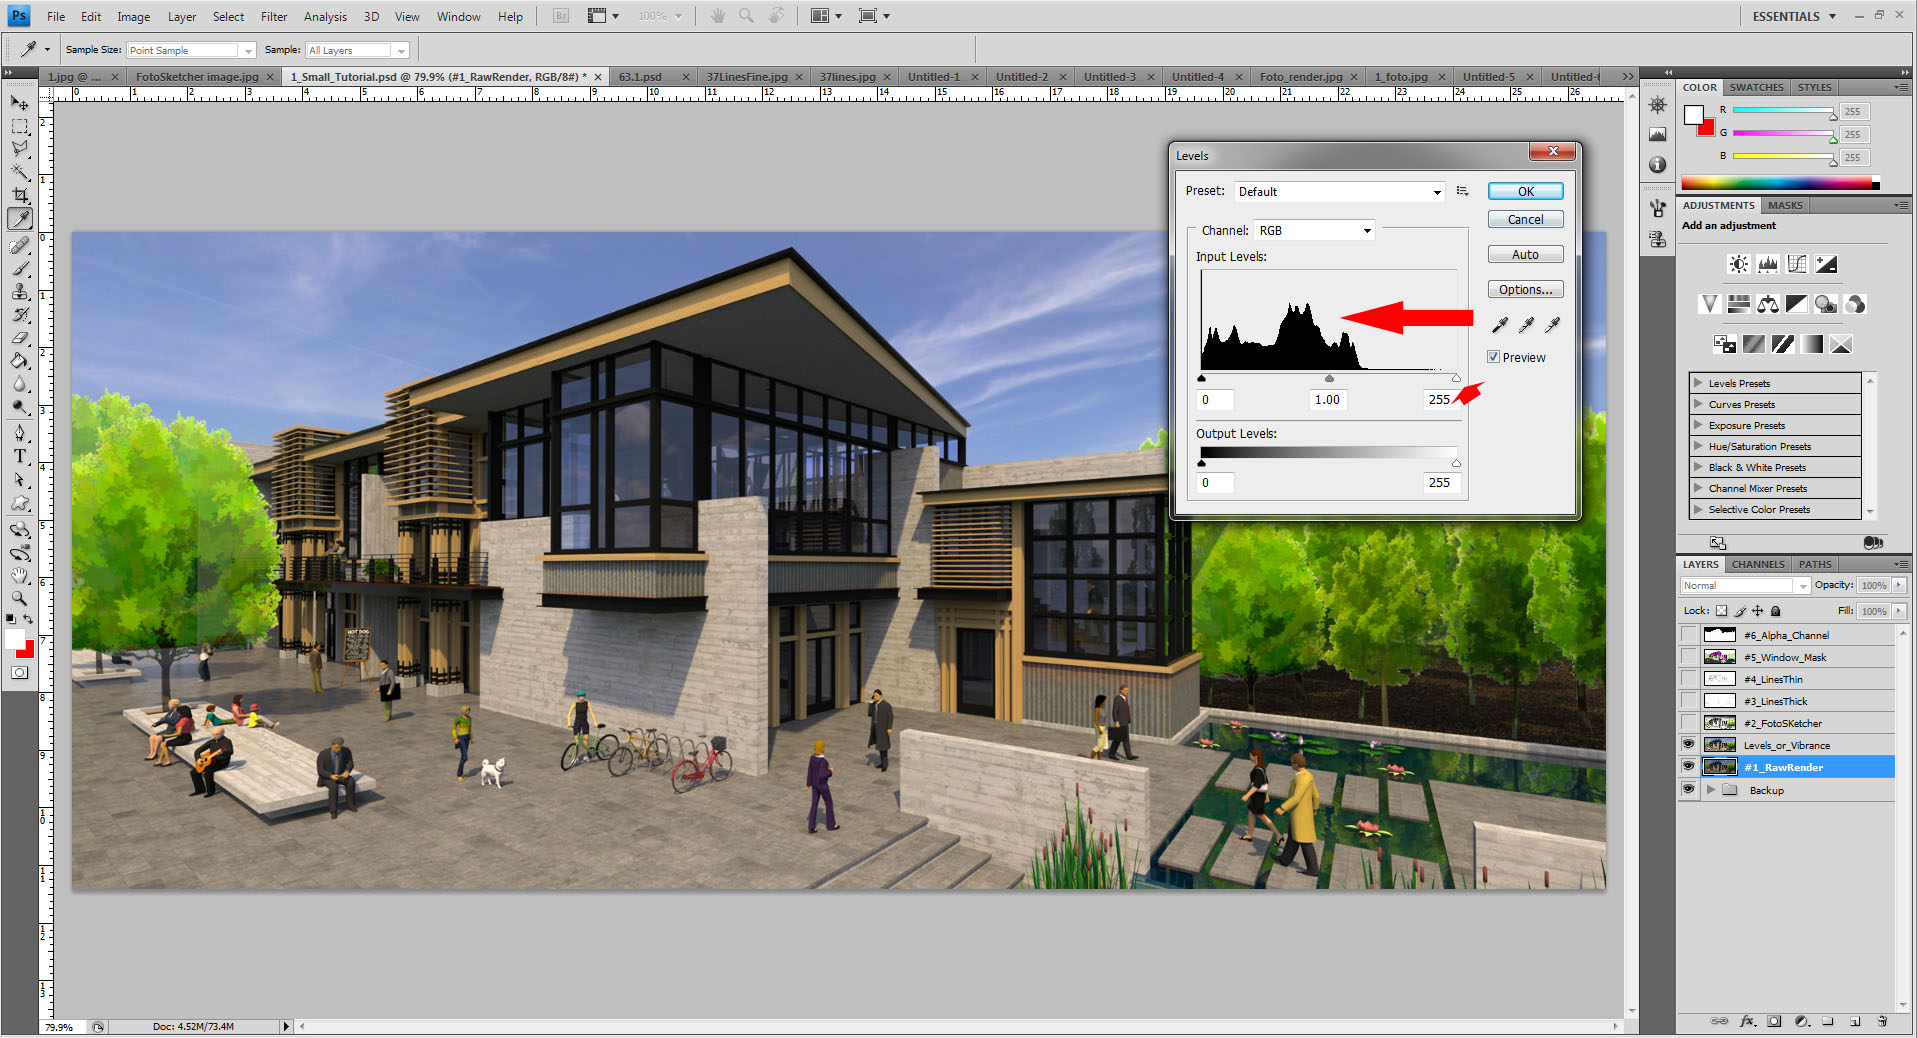
Photoshop: Adjust the Levels
The original Raw Render is very dark so I start by opening “Image > Adjustments > Levels…” (See image above). You can see on the levels window how the right side is very flat because the scene is quite dark (If you dont know how to read Levels there are many free tutorials – just search online) Slide the pointer on the right towards the left to brighten the image until you like the look of the scene. The Image above is the result of my adjusting Levels. I also frequently use “Image > Adjustments > Vibrance” and Increase Vibrance by a large amount and Saturation by a small amount. You should play around with this setting and see what you prefer. Again, this is all personal preference – The trees in the image above are very saturated, you might not like that – adjust to your taste.
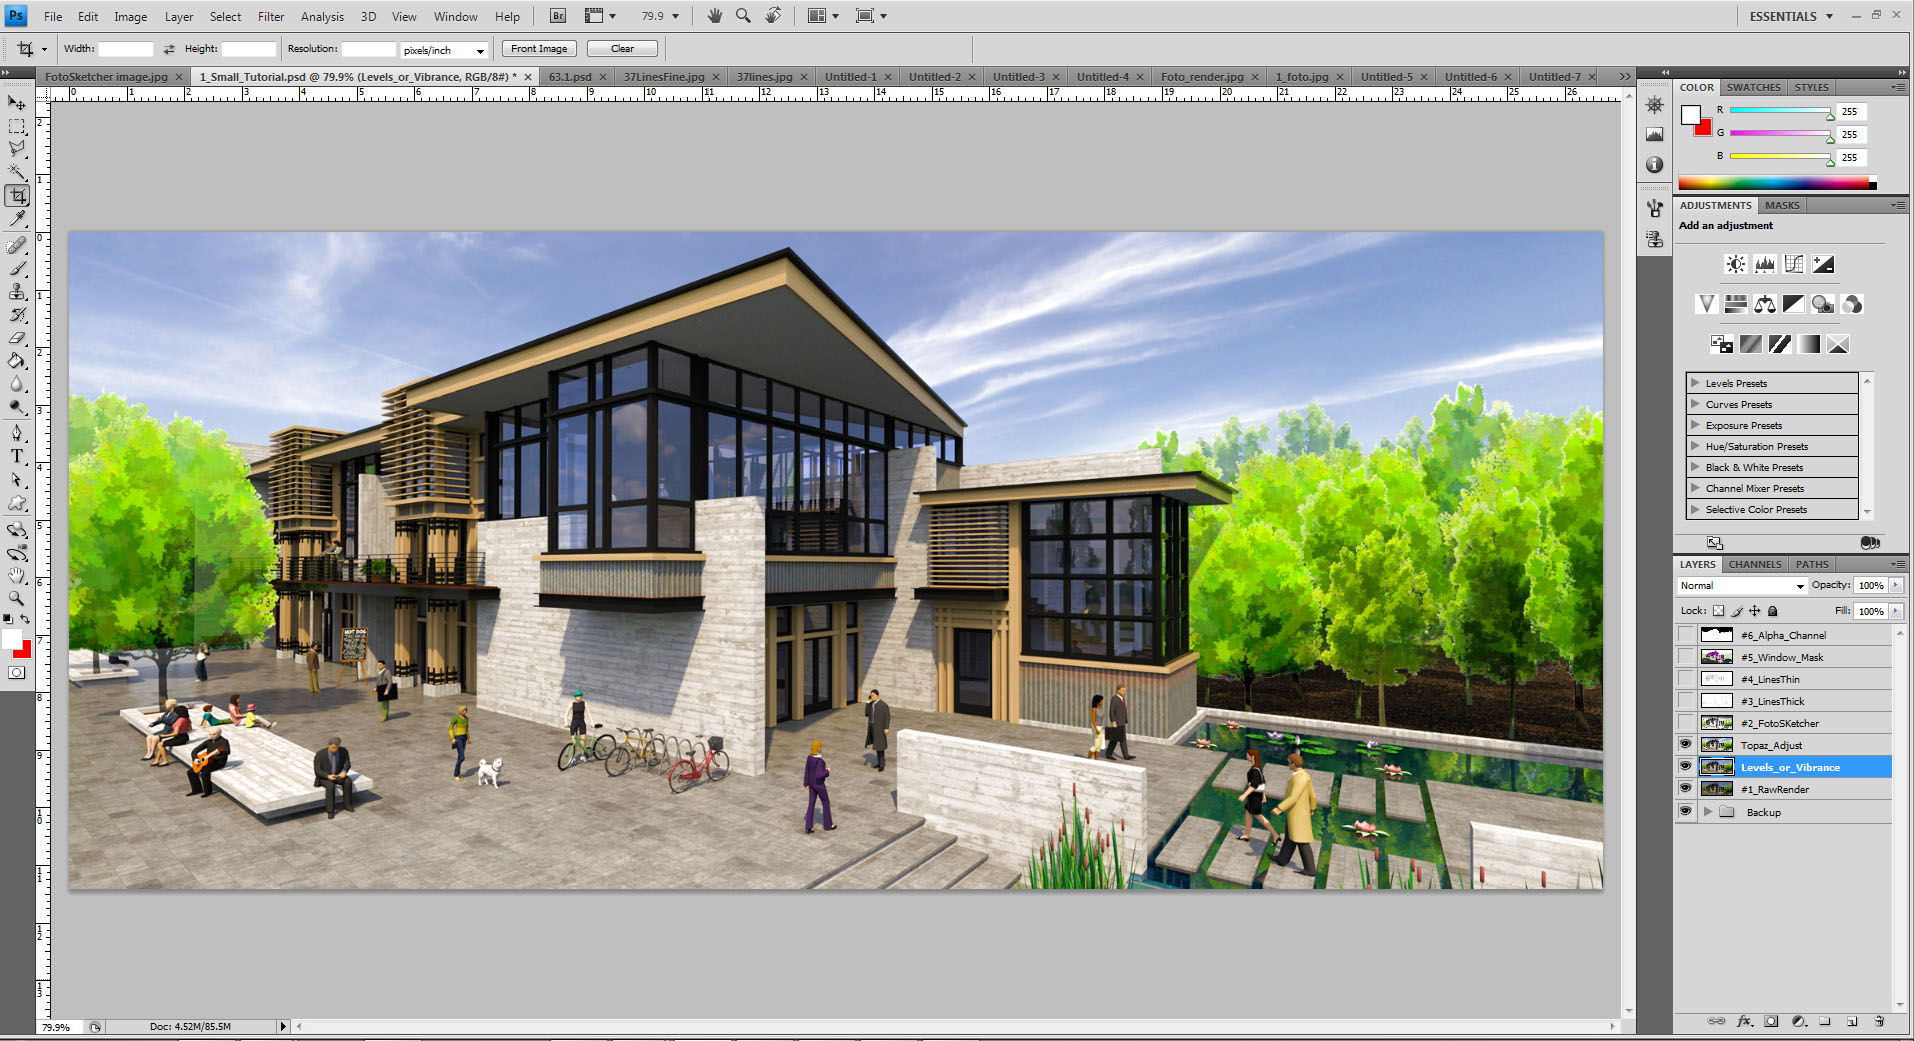
Image after Topaz Adjust applied – HDR Collection: Dynamic Brightness
Next, I copy the Levels/Vibrance layer and then open Topaz Adjust (link here). This add-on filter can give an image some extra “punch” or “pizzazz” through various tone mapping filters. Some of my favorites are:
- HDR Collection: Dynamic Brightness, Dynamic Pop
- Classic Collection: Brilliant Cold, Brilliant Warm
–
This add-on filter is not cheap but you can find coupons online and Topaz has email discounts sometimes as well. I highly recommend Topaz Adjust not only for your NPR/PR renders but also for your standard photography. I have heard that NIK software (Free and formerly by Google? – Link
Here) has many similar filters for Photoshop but I have never tried it.
Adding the Linework
Turn on both linework layers and set the ‘Blending Mode’ to ‘Multiply’ – Adjust opacity to taste. For this render I had thin lines set to 87% and thick lines set to 100%

Turn on both linework layers and set to multiply
I want to emphasize certain portions of the image by increasing the line thickness – In this case the foreground objects (steps, walls, bench) and the large concrete wall & trees. As noted in the in composite image below I painted portions white to mask out the heavy lines. Recall that this layer is in ‘Multiply’ blending mode so painting white is effectively “erasing” the lines. Turn off all but the thick line layer and paint out areas where you dont want any thick lines. If you prefer non-destructive masking add a layer mask and paint out that way as well. Note that none of the building except the large concrete wall has any thick lines.

Standard Resolution (Thick Line) Layer
Mask Out the Windows
Sometimes it is helpful if we can isolate the windows so that we can make adjustments to only the glass area. Turn on your Window Mask layer and select it to make it active. Click the Magic Wand Tool (W) and select the purple areas to create a selection set of only your windows. Your selection should look similar to the image below. Note the magic wand tool has been selected at the toolbar to the left. If you want to save this mask for use later go to “Select > Save Selection…” at top menu.
–

Window Mask Layer with windows selected
–
With the selection set (marching ants) still active turn off your Window Mask layer and select the Thin Lines layer to make it active. Cut the windows out of the thin line layer by hitting “ctrl-x” – Now hit “Ctrl-d” to remove the selection set and then hit “ctrl-v” to paste only the window contents in a new layer. Note your version of Photoshop may have “paste in place” which will put the new layer contents exactly aligned with the rest of the image (I have an older version so I have to use ctrl-v). If needed move the windows you just pasted to align with the background by using the “Move Tool” (V). I went through all this effort so I can reduce the opacity of this newly created window contents layers, but there are others uses such as playing with the blending modes so the window contents appear slightly opaque, etc. Play around with this layers opacity and blending modes and see what ideas you can come up with.
–
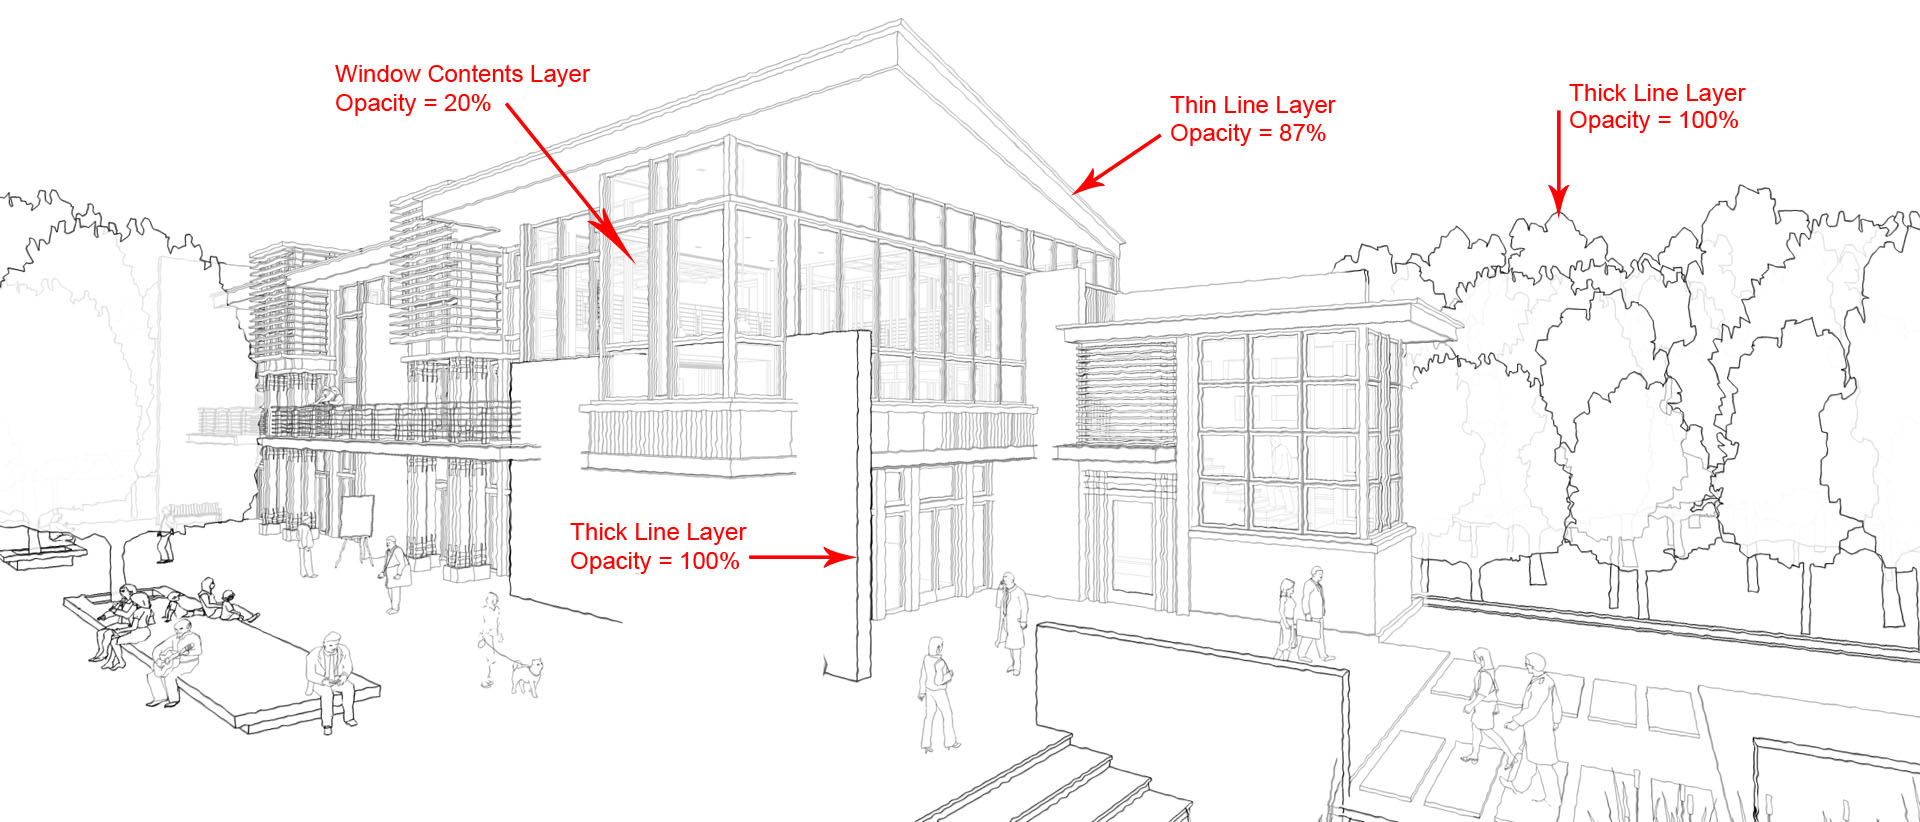
All Line Layers Turned ON – You can see how the different layers appear
–
In the image above I have turned on all the line layers so you can see the different line thickness / opacity. Note the thick lines in the foreground / trees (100% opacity), medium lines at the building (87% opacity) and the very thin lines inside the windows (20% opacity). I have reduced the opacity in the window contents so you can just barely see the interior through my windows. If you dont separate and lower the opacity of the window contents the interior lines will be just as thick and prominent as the exterior lines. Note that all the lines have a slight “squiggle” to them – this is the next step.
–
–
–
–
–