NPR Tutorial: Making of the Mixed Use Modern : Part 3
Part 1 | Part 2 | Part 3 | Part 4
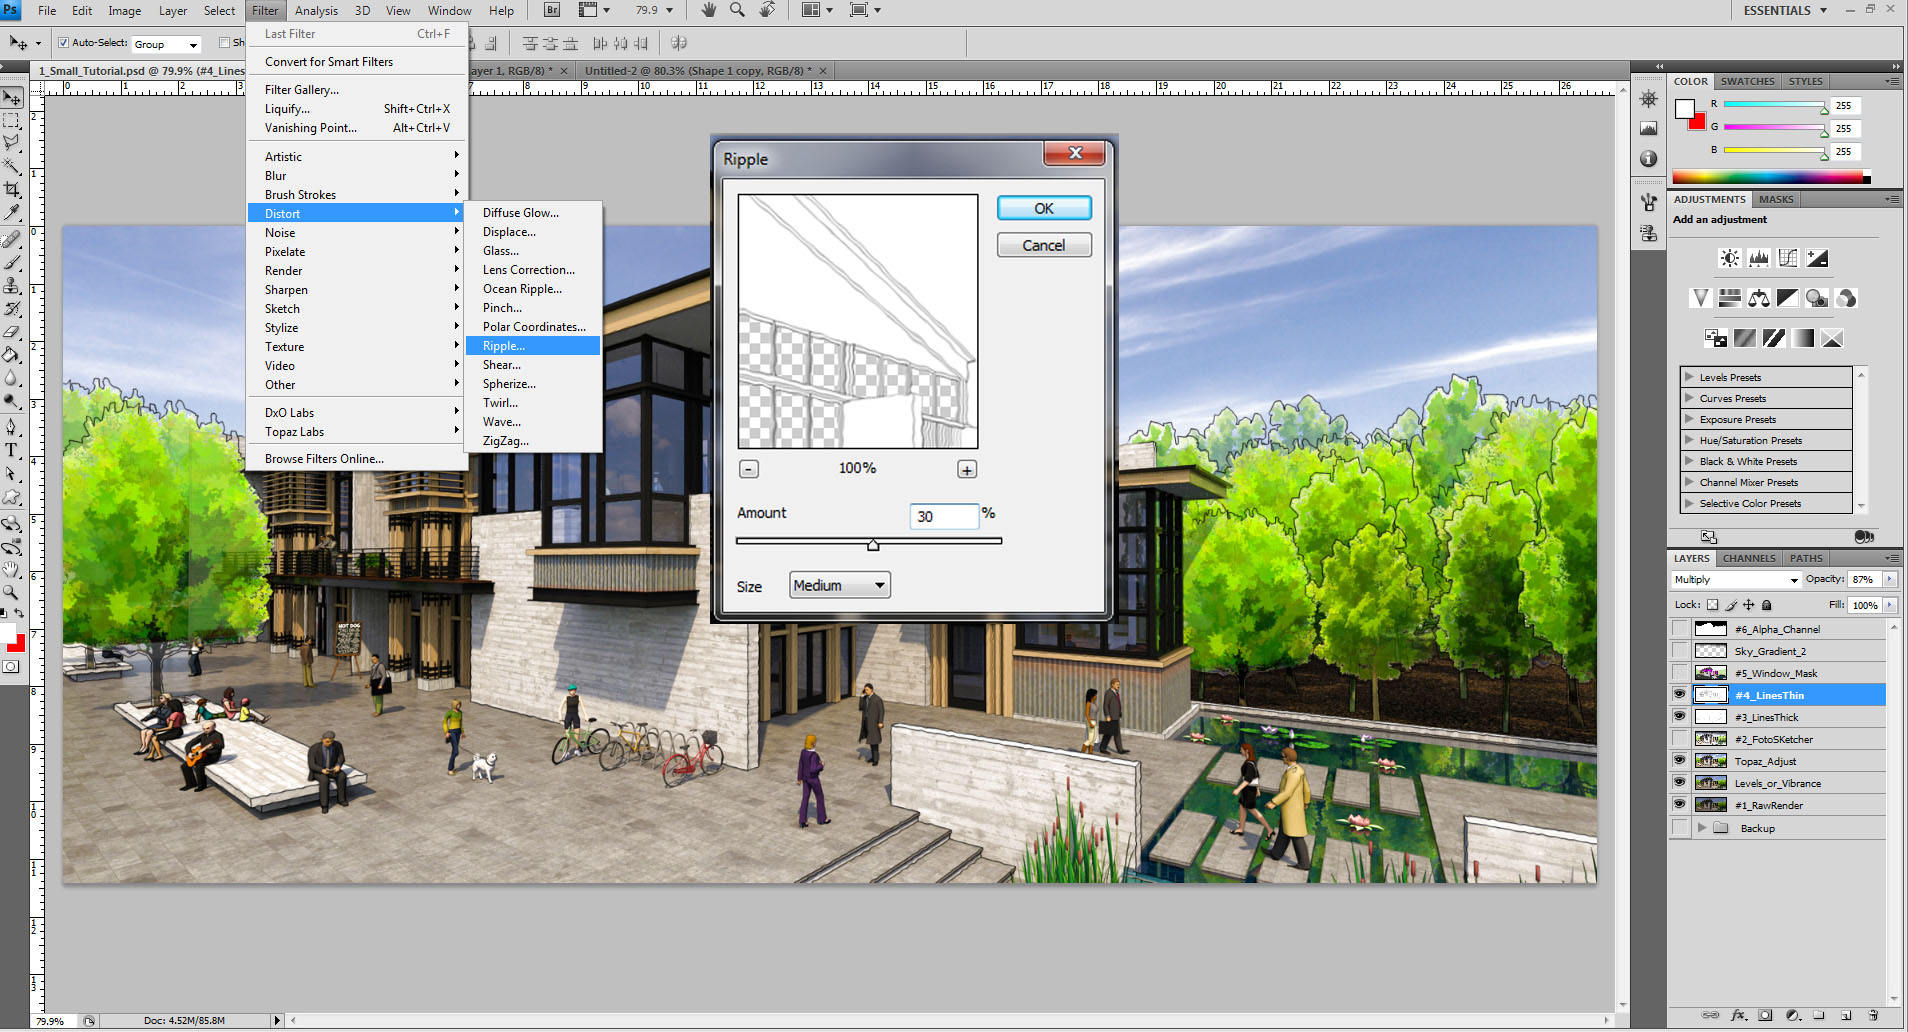
Making the Lines Appear to be Hand Drawn
After adjusting the line layer opacity you can make them look “wavy” or “squiggly” so that they appear to be hand drawn. To do this make sure that your active layer is one of the line layers. Then select “Filter > Distort > Ripple…” (see image below). From the Ripple Dialog I generally adjust the’ amount slider’ to between 30% and 60% with “Size” = medium as shown – You should play around with this setting and see what look you prefer.
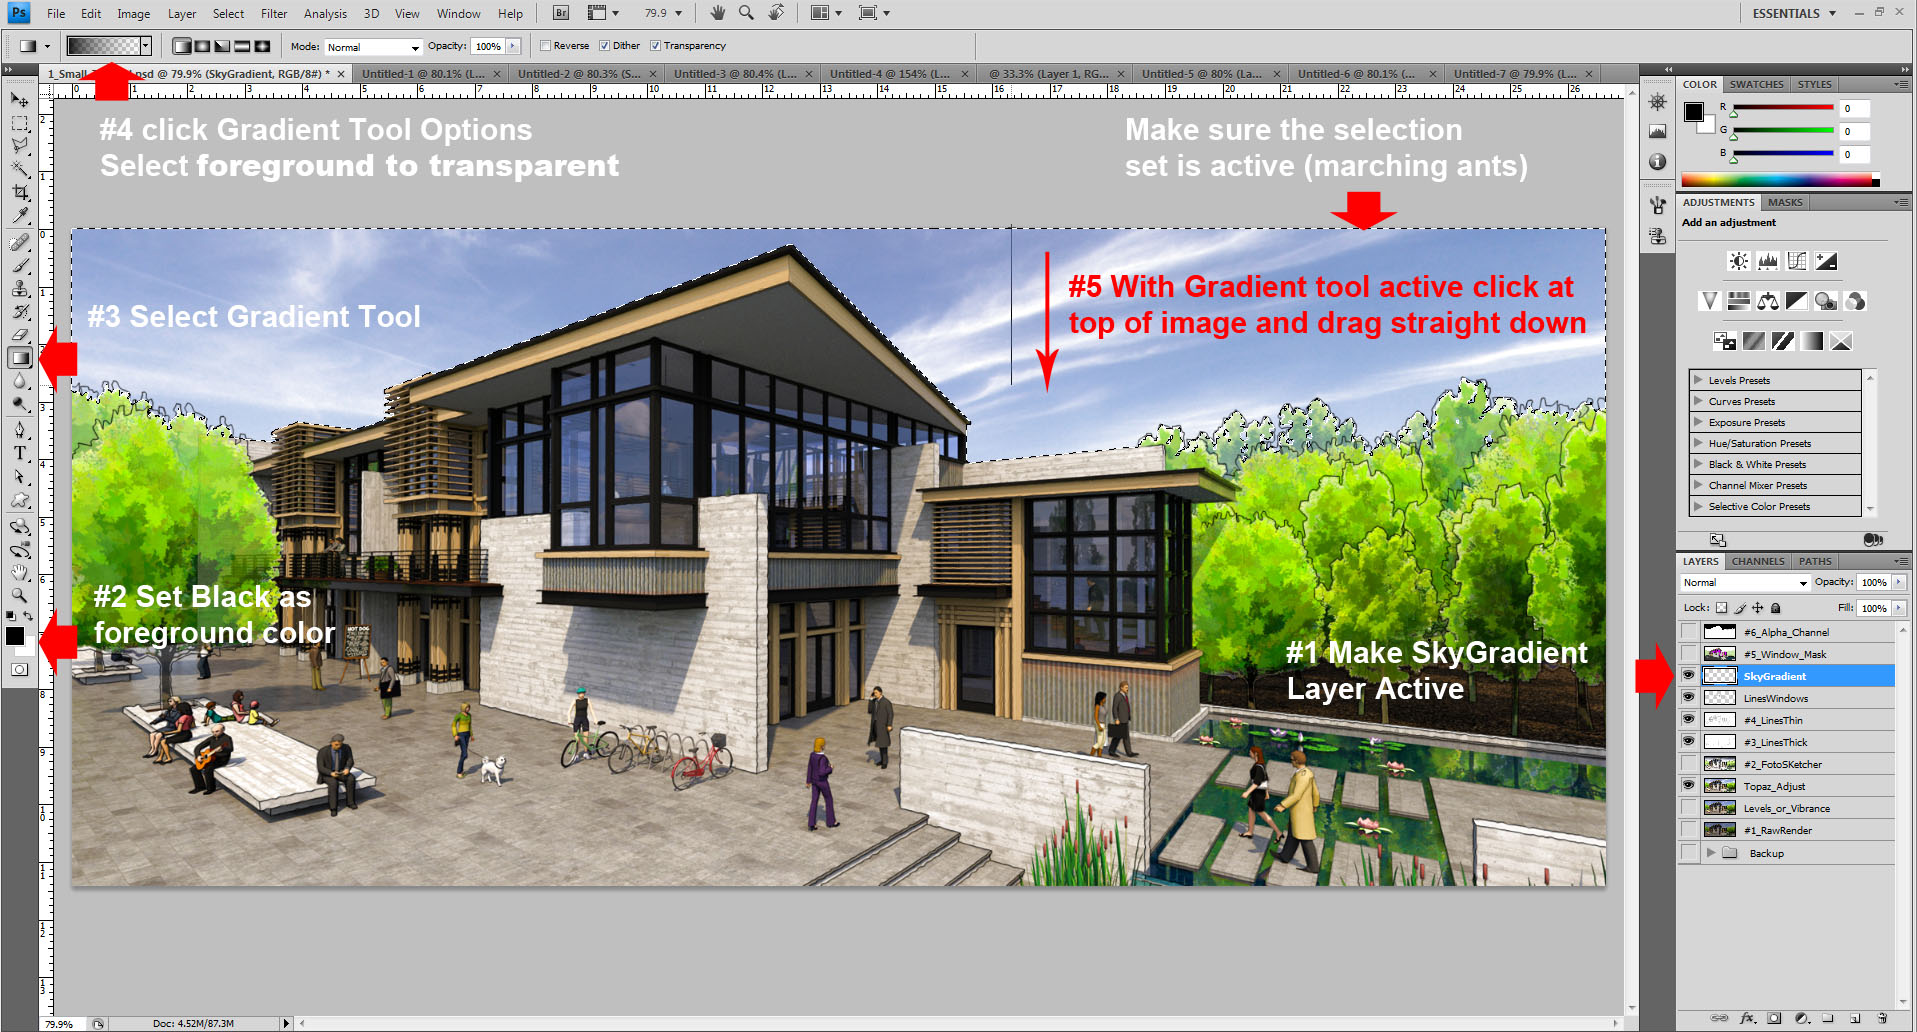
Adding a Gradient to the Sky
Next, we will create a nice “gradient” in the sky. In the Final Image you will note the sky becomes darker towards the top. First create a new BLANK layer and name it “SkyGradient” (See Image Below). Place this layer near the top of the layer stack above your line and render layers. Now click on your Alpha Mask layer to make it active and turn visibility on. Click on the ‘Magic Wand Tool’ (W) and then click somewhere in the black – You should now have a selection set as shown below (marching ants). As before, you can save this selection set for later use under “Selection > Save Selection…” Now turn the Alpha Mask Layer visibility OFF and select the SkyGradient layer to make it active again.

Use the Alpha Mask to select ONLY the Sky
Below is a process for creating a simple Sky Gradient. Note your selection set should still be active as shown since you only want to effect the sky – Set your foreground color. In this case I went with black but you might prefer dark blue, etc. Click the Gradient Tool and then from the options bar above click the gradient Tool dropdown. Select “Foreground to Transparent” from the list of choices. Next, click at the top edge of the image and drag straight down. The line next to the red arrow below shows how far I went with my gradient tool. You may need to try a few times to get it looking good.
Sequence for the Sky Gradient
–
Below is the image with the gradient applied. The effect is a bit dark so I adjust the layer opacity to 64%
–

After Using the Gradient Tool
Below is the final image.
–
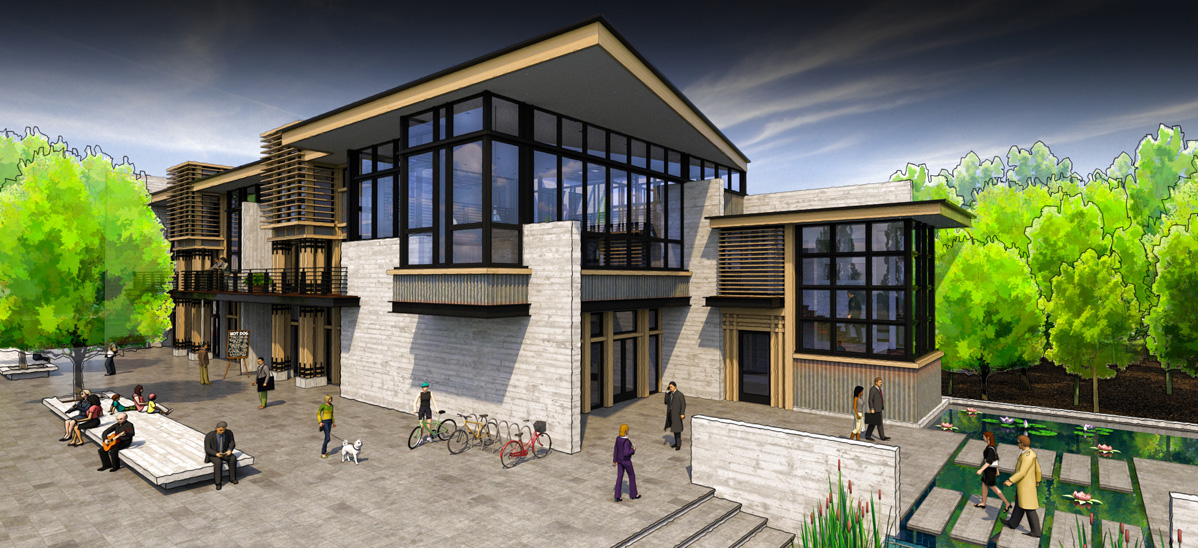
The Final Render (Base Render, Linework, Sky Gradient)